
Happy Wednesday! Can you believe November is already almost half way over? Time is flying! Here is a compiled group of fabric organization strategies I used to finally organize my sewing cabinet. Because I only sew occasionaly, and often use my fabric for other things like party decorating, my main goal was to have it visually organized in a way that was easy to asssess inventory. So far, it has also been easy to access for projects and things, but a crafter with a large fabric stash may want to a more invested solution.

Three DIY Fabric Organization Ideas.

3. Made into miniature fabric bolts.
My first goal was to organize the large pieces of fabric I had. Like my felt folder project, I used a rectangular basket I purchased at Michael’s a while back. The inside of my basket allowed for 8″ inches wide, so I decided to cut Dollar Tree foamboard pieces into 6 squares each, with some scraps to spare. Ultimately I used 5 foam board sheets for a total of $5. I won’t go into loads of detail about the obvious, but basically I just marked everything with a ruler and cut it out with my handy Olfa knife. They don’t have to be perfect since they will be wrapped in fabric– the most important thing is that they fit well into your container. Once you’ve created your foam board pieces, begin folding your fabric into a height that works for your bolt bases. Then wrap the fabric around the foam board just like a minature bolt of fabric, and secure with pins or another means. By then placing these miniature bolts vertically, it is easy to visualize the colors and patterns you have available. If you sewed a lot, you could be sure to fold each fabric piece a particular width, and then be able to multiple the number of wrapped times (For me 1 wrap would equal 16″) and calculate the length of fabric without even unrolling it. Unfortunately I’m not that patient, so I just folded mine whatever way was easiest for it to fit on the 8″ x 8″ square.

The making of the bolts.

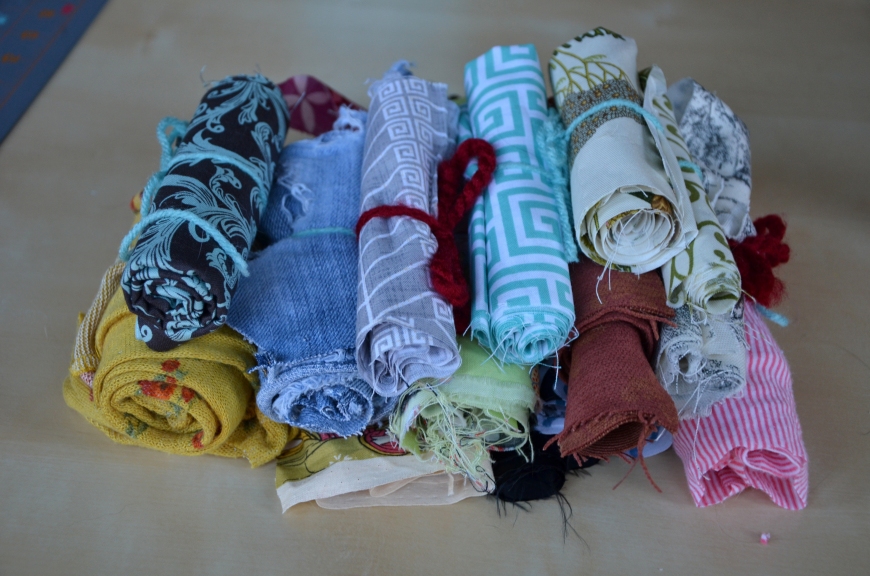 1. Rolled up into fabric packages and tied up with string.

- Finished miniature fabric bolt secured with pins.
Now onto the smaller pieces. I elected to use the roll-and-tie method I’ve seen around on Pinterest for pieces that were definitely less than 1/4 of a yard and usually around 1/8 of a yard. These weren’t scraps in the traditional sense but They weren’t large enough for real sewing projects or party decorating either. I simply used some yarn scraps I had around and tied each roll with a bow. Now all that’s left is I find a container for them.

Aren’t they just inviting you to sew something?
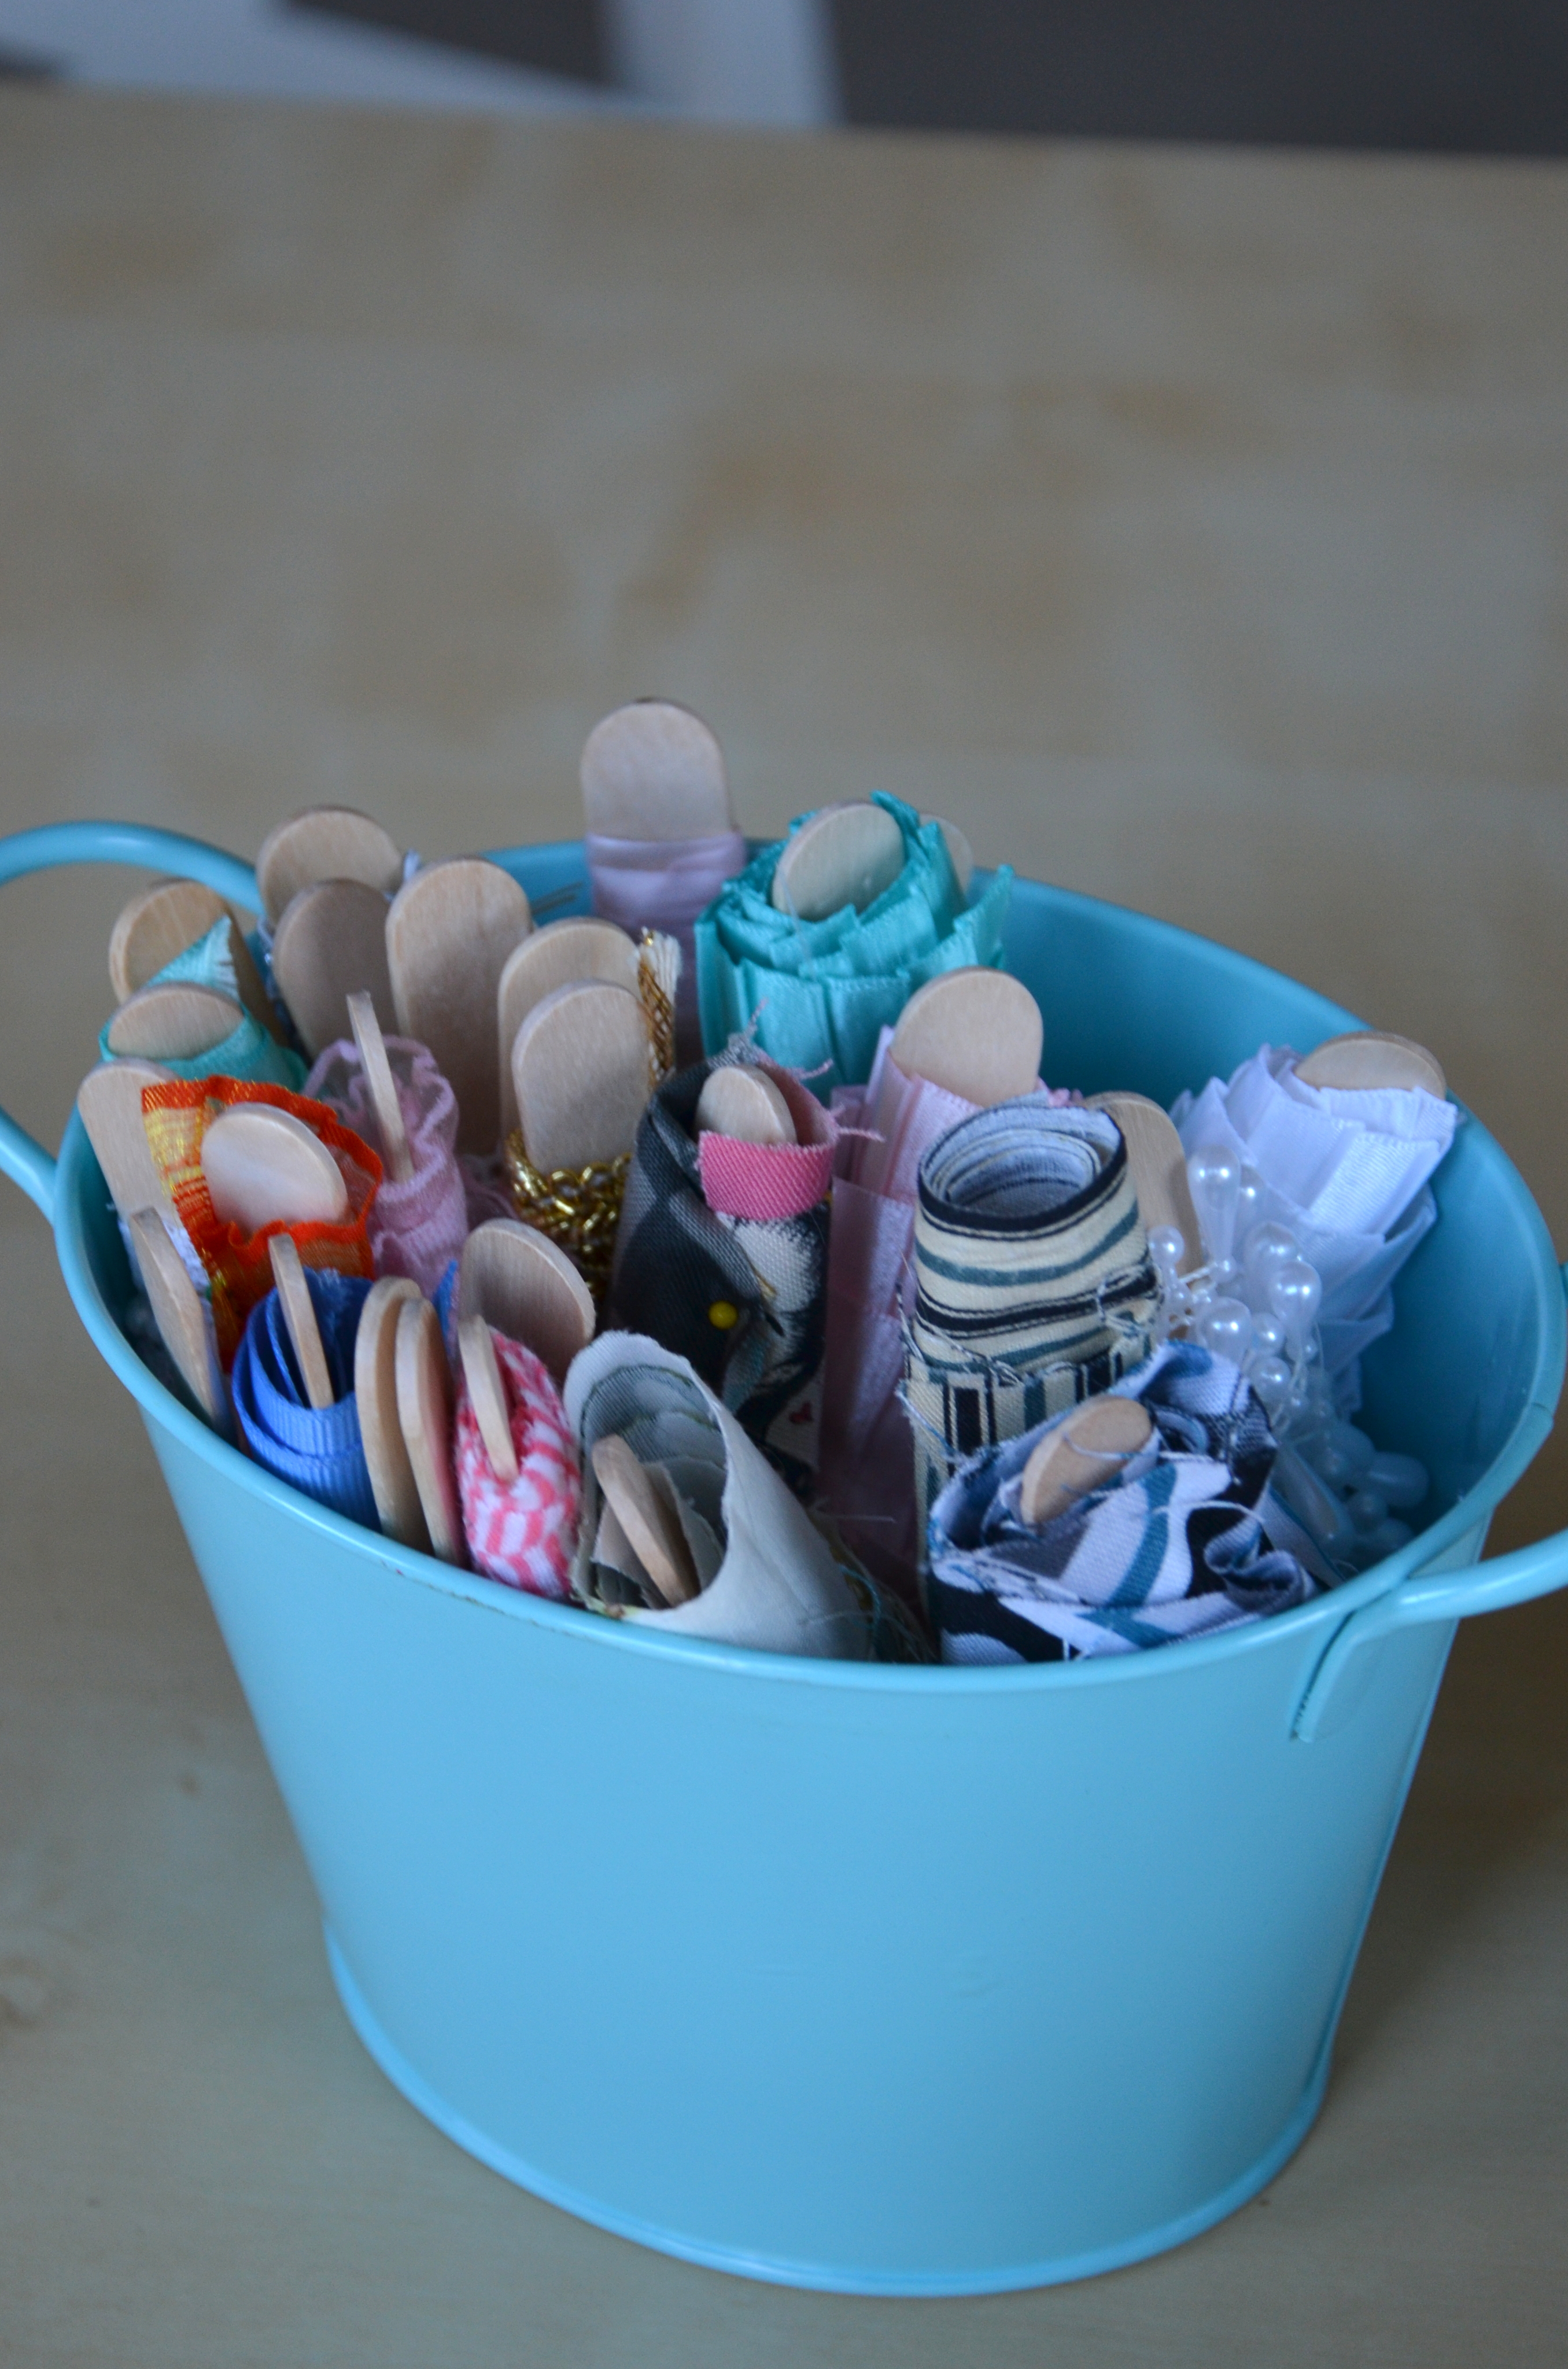
2. Wrapped on popsicle sticks and secured with pins.
Finally for my tiny scraps. I also used this method to organize scraps of ribbon I had been storing in a completely inefficient way. I decided to use large thick popsicle sticks and wrap the fabric scrap or ribbon around the stick and once again secure with a pin. This was another idea I’d seen floating around Pinterest. I used this open tin, from the Dollar Tree, to store them for easy visualization. These scraps are mostly meant for paper crafts and scrapbooking, so they will be stored away from the rest of my fabric.

Great access to the scraps for paper crafting and scrapbooking projects.
Hope these tips help you organize your own fabric stash! Let me know if you have any other great fabric organization tips!
Until next time,
|The Creative Physician|


I’m going to be sharing my sewing room soon – but I must say I really like your Popsicle stick idea – never heard of that! I used comic book backer boards for a lot of my stuff, and rolled the big stuff. I crazy quilt – so I have odd pieces of velvet and satin, which are in a drawer, cubby system I bought from Walmart – divided by color. I’m almost finished, and I hope you come visit when I am ready to reveal.
Oooooo…..so pretty! I’m not sure which one I like the most! I really really love the ones in the ‘basket’…but I know that’s not always the easiest way to store it…but it looks so cute! I Love Love Love organization posts!!! Maybe because my Studio is always in a state of ‘creative mess’…:) Great job my friend!
Great ideas! Love DIY organization — totally my thing. Love what you’ve created here, especially with the different sizes. Sometimes it’s so hard to come up with a comprehensive solution for everything.
This is an excellent idea, and I do need to get organized—Thanks for sharing these ideas. 🙂
These are great ideas! I really must set aside some time to organize….hmmm…maybe next year! LOL
I love ways to stay organized, thanks for sharing:)
Thanks for inspiring me. The digging into a cardboard box thing is getting tiring haha!